

Aero bars have become increasingly popular on bikepacking bikes, largely due to the growing influence of ultra-endurance races like the Tour Divide, where top competitors spend over 18 hours a day in the saddle.
What might come as a surprise, though, is that in both these events and adventure riding more broadly, aero bars aren’t primarily about speed. Most riders agree that their greatest benefit is the added comfort they provide over long distances.
Let’s get aero!! This article was originally published Dec 2018 but has been updated in May 2025.
Why Bikepacking Aero Bars Are Awesome
Enjoy A New Riding Position
Aero bars provide an alternative riding position that’s especially valuable on long-distance rides. By shifting your upper body weight onto your elbows and upper arms, you’ll reduce strain on your wrists and hands. They also let you stretch out more, engaging different muscle groups in your back for greater comfort over time.
Cut Through The Wind
Wind resistance is typically the biggest force working against you when cycling. Aero bars help reduce your frontal profile, allowing you to ride faster with the same amount of effort. This is a huge advantage in headwinds and a great asset for riders aiming to cover longer daily distances.
Expand Your Mounting Options
If you’ve ever removed aero bars after an ultra event, you’ve likely missed the extra space they provide for mounting accessories. In a bikepacking setup, aero bars are perfect for attaching bike computers, lights, smartphones, or feed bags. You can also add a Profile Design UCM ($11 on Amazon) to increase horizontal mounting space.
Aero Bar Adjustments For Bike Travel
Touring and bikepacking bikes vary a lot in frame geometry, and since comfort takes priority over speed in these disciplines, you’ll benefit from aero bars that offer maximum adjustability.
Here are the aero bar adjustments to look out for:
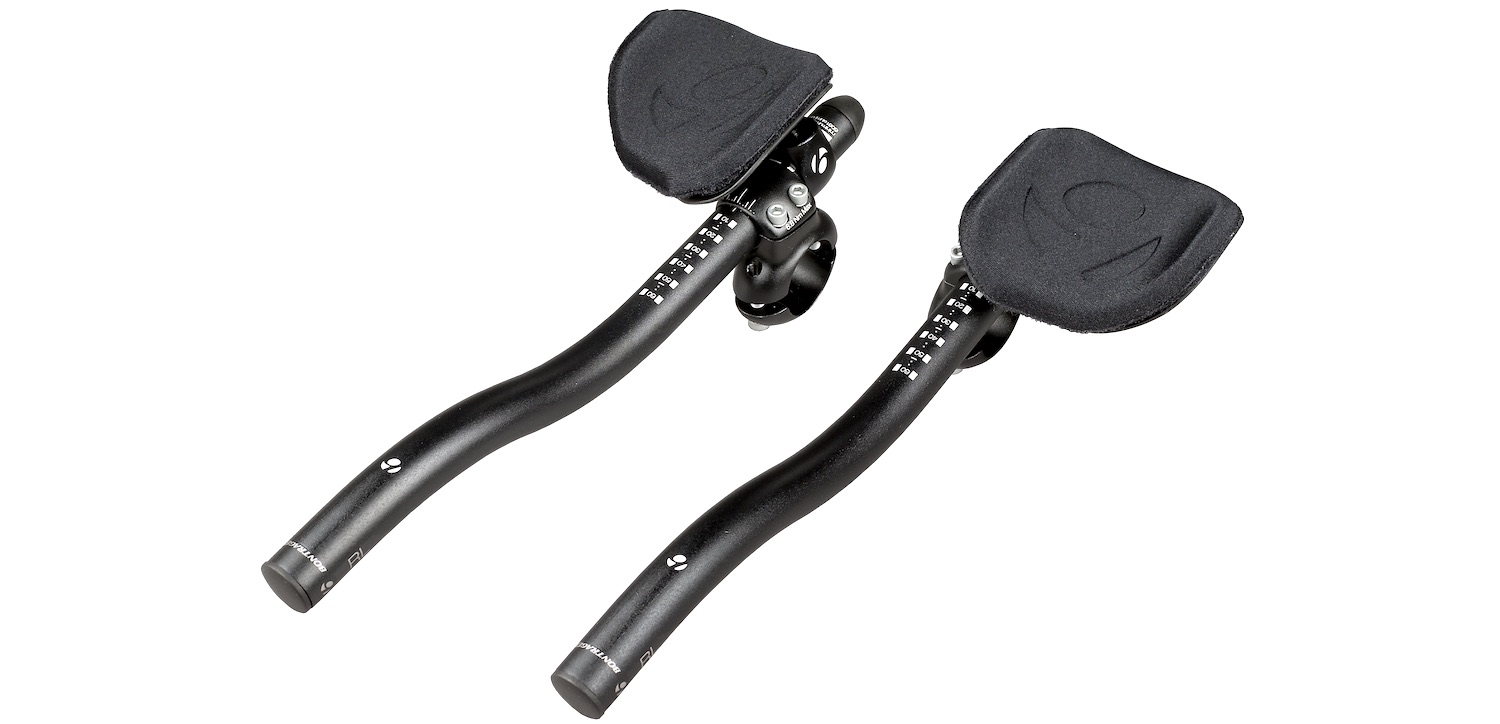
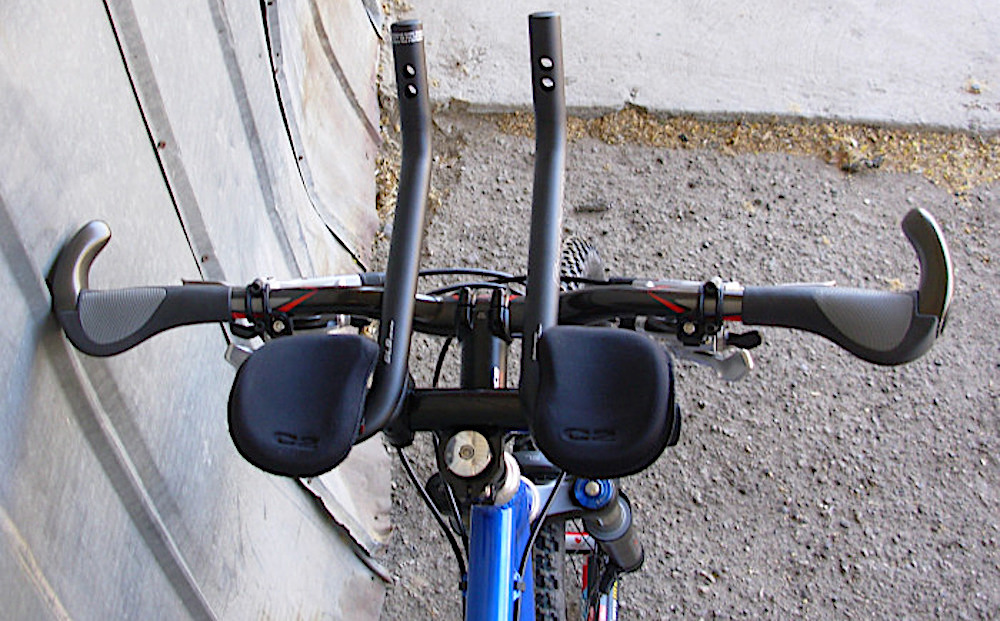
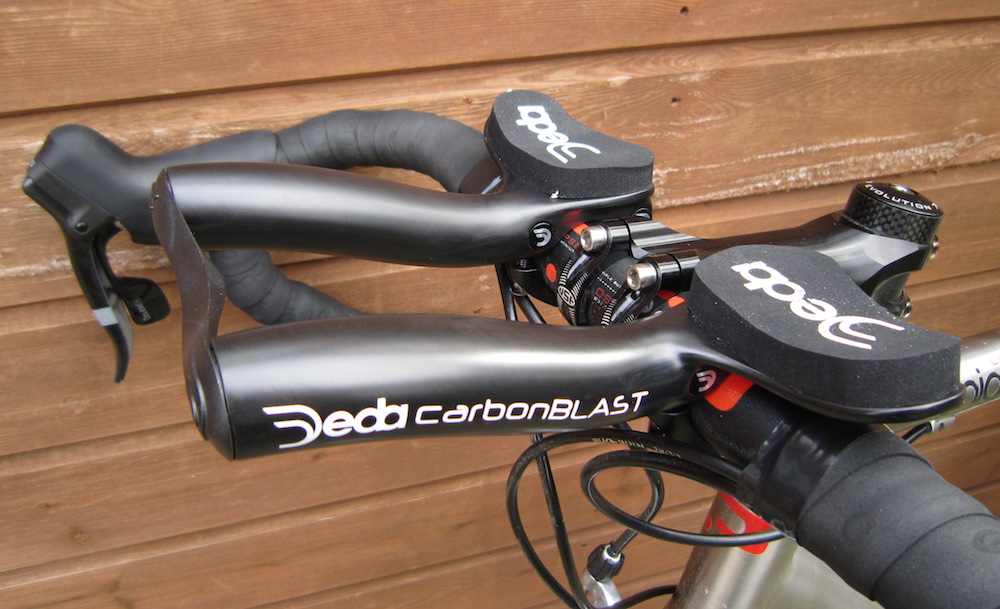
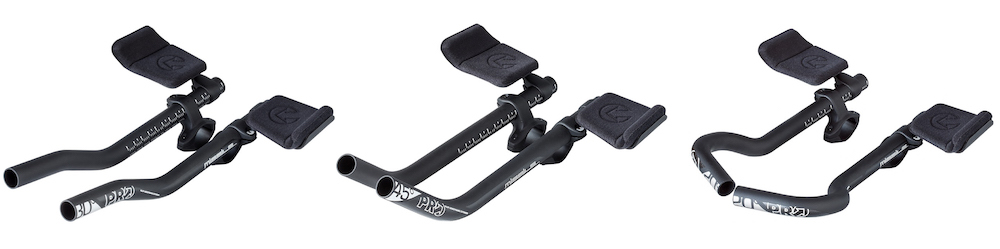
Armrest Adjustment. Many aero bars come with fixed or minimally adjustable armrests. For bikepacking, you’ll likely want to bring the armrests closer to the saddle to improve comfort. Models like the Bontrager Race Lite (pictured above) excel in this area, offering a broader range of positioning options.
Arm Pad Adjustment. Most arm pads can be angled inward by up to 15 degrees to fine-tune your fit. They’re also available in various thicknesses. Profile Design, for example, offers 16mm and 20mm pads, with the thicker option being more comfortable on rough dirt roads.
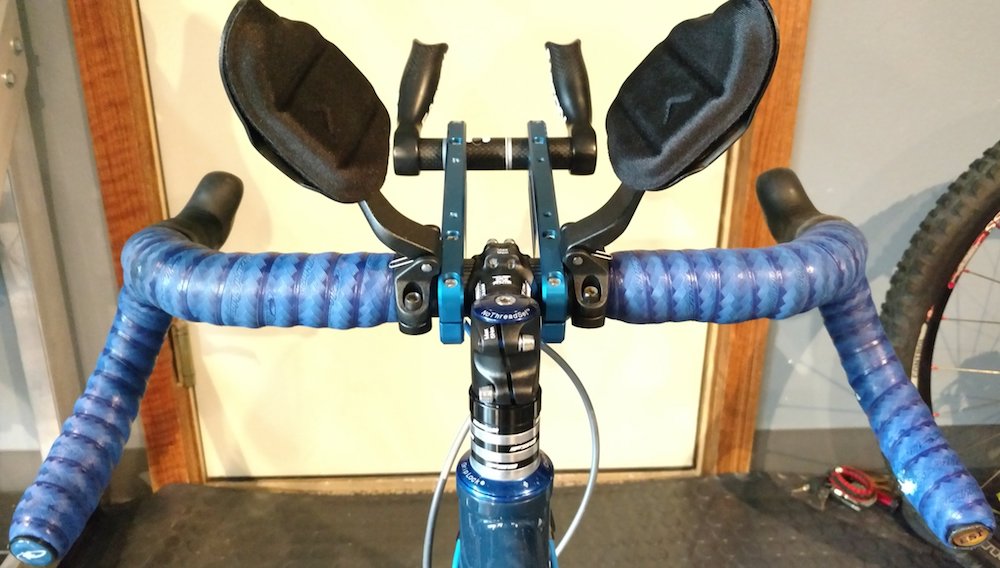
Extension Adjustment. The forward extensions (often called “skis”) are typically adjustable in length, width, and angle. These adjustments help you dial in a position that balances comfort, control, and aerodynamics.
Height Adjustment. Some aero bar systems are compatible with riser kits, which can raise the bars by 20–70mm (around 1–3 inches). This height tuning helps maintain a proper hip angle and shortens your overall reach, both of which contribute to a more relaxed and sustainable riding position.
Frame Design & Aero Bars
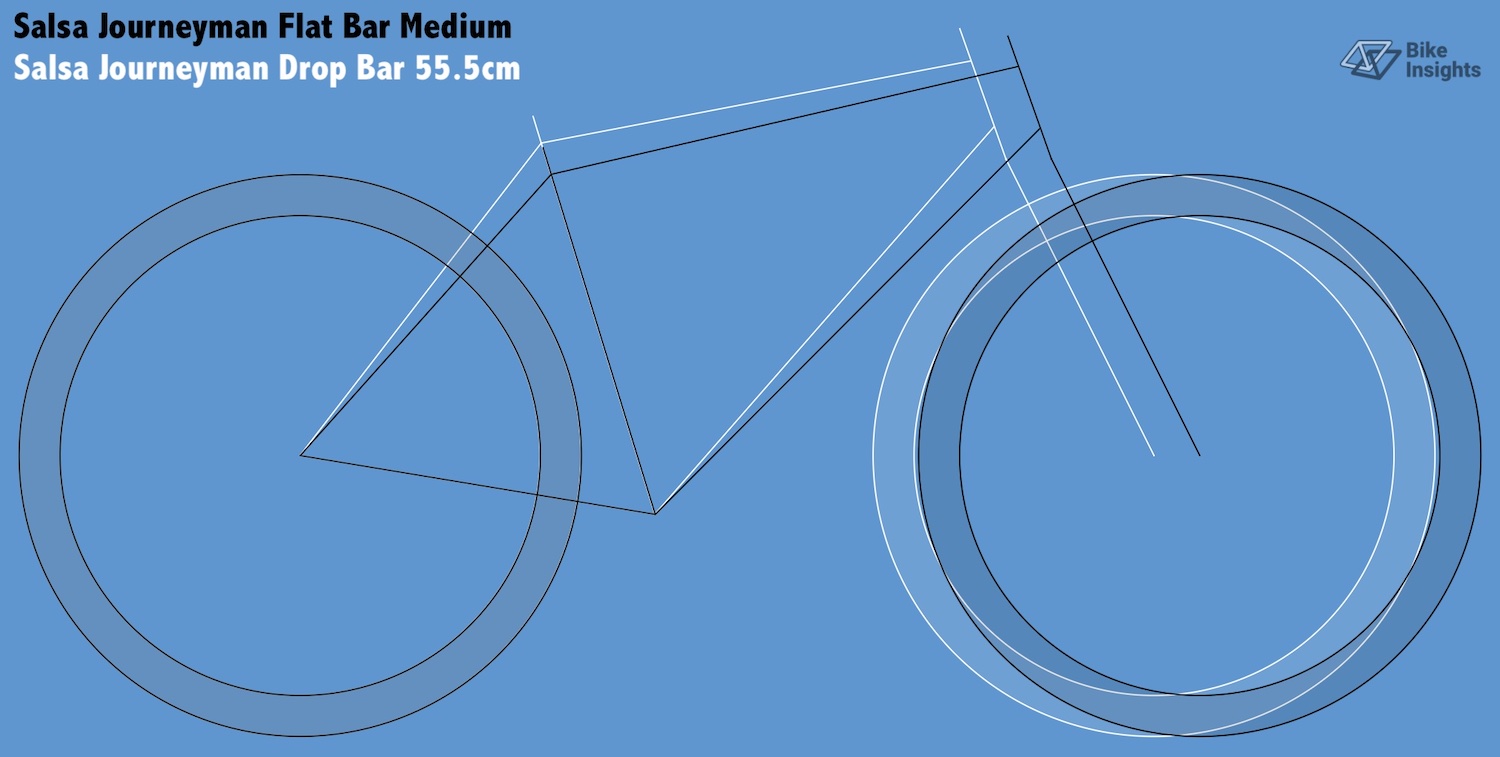
There are two main frame geometries used for bike travel:
- Frames built for flat handlebars (black outline), which typically have longer top tubes
- Frames designed for drop handlebars (white outline), which usually feature shorter top tubes
Since riding in an aero position involves reaching further forward, drop bar bikes, with their more compact top tubes, are generally better suited for aero bar setups.
That said, there are a few products available that can help you achieve a comfortable aero position on flat-bar bikes.
The first option is aero bars with sliding armrest mounts, such as the Bontrager Race Lite Clip-On. This design lets you position the arm pads and extensions significantly closer to your body (typically by 40–80mm), helping to compensate for the longer top tube found on flat bar bikes.
Another solution for flat bar bikes is a steerer-mounted adapter like the Fred Bar. It places the aero bars directly above the stem, effectively reducing the reach from your saddle to the aero bars by up to 80mm.
Weighing in at just 140 grams, the Fred Bar was initially created for flat-bar bikes but works equally well for riders with drop bar bikes that want a shorter and more comfortable riding position. A side benefit to the Fred Bar is that you can quickly add or remove your aero bars from your bike by simply removing your stem top cap.
Aero Bar Setup Height
On a touring or bikepacking bike, it’s generally best to position your aero bars a few centimetres higher than your saddle. This isn’t primarily for comfort, but to help maintain a consistent hip angle when switching between your aero and regular riding positions.
A significant change in hip angle would normally require a different saddle position relative to the crankset – hence the steep seat tube angles found on time trial bikes. Those lower, more forward setups also demand saddles with a wider, more padded nose for comfort.
For bike travel, it’s smart to start with a higher aero bar position. From there, you can gradually lower the bars until you strike a balance between aerodynamic efficiency and the ability to hold that position for long durations.
If you notice yourself sliding toward the nose of the saddle, it’s a sign that your position may be too aggressive – try either moving the saddle forward or raising your aero bars. In cases where your aero bars are only slightly lower than your saddle, simply sliding the saddle forward on the rails can help accommodate the change in hip angle.
While you can raise your handlebars if there’s room on the steerer tube, using an aero bar riser kit is often the better solution. Riser kits allow you to fine-tune your aero bar height independently from your handlebar setup.
And if you prefer an aggressive handlebar setup (low height relative to the saddle) but want to preserve proper hip rotation, a riser kit with up to 70mm (3 inches) of elevation can make all the difference.
Extra Low Aero Bar Heights

Looking to get even more aerodynamic? You should look into:
Dual-Position Seatposts
A smart solution for managing hip angle changes is the Redshift Switch seatpost. With a quick adjustment, you can slide your saddle forward by 50mm (2 inches), effectively increasing your seat tube angle by a few degrees. When you’re done riding in the aero position, you can shift your seat back to a more suitable location for riding upright.
Time Trial Saddles
Lower, more stretched-out positions put extra body weight on the saddle’s nose, so finding the right saddle is essential for comfort. Trying out a few time trial or triathlon saddles can make a big difference. If your riding position isn’t too aggressive, the Selle SMP Pro is a versatile choice that works well for both time trials and road riding.
Aero Bar Shape and Construction Material
Aero bars typically feature two separate extensions, known as skis, though some models connect the extensions at the front. Most riders prefer individual extensions since they allow you to adjust the width between the armrests.
Extensions come in various shapes to accommodate different wrist angles, with more angled up designs generally feeling most natural.
Aero bar extensions are made from different materials too, including aluminium, carbon, and titanium. Aside from a modest weight difference of around 40–50 grams, the materials don’t significantly impact performance.
Fold-Up Armrests
There are two main reasons to choose fold-up armrests.
First, they free up valuable space on narrow drop handlebars by folding out of the way, allowing you to use the top of the bars rather than losing that area. Fold-up armrests also provide a better fit for bikepacking stem bags (more on that below).
The drawback? Fold-up armrests don’t offer any forward or backward adjustment – they’re fixed in place. For this reason, I suggest only installing fold-up armrests once you’ve finalised your aero bar position.
Mini Aero Bars
These compact and lightweight aero bars (around 200 grams) are intended for short rides, like sprint-distance triathlons.
Although the weight savings may be appealing, most riders who have used mini aero bars for bikepacking find that the short extensions put excessive pressure on their wrists, causing discomfort after only a few minutes.
That said, mini aero bars might still work if you place very little weight on your upper body, typically requiring a very short and upright riding position to avoid wrist strain.
Other Aero Bar Designs
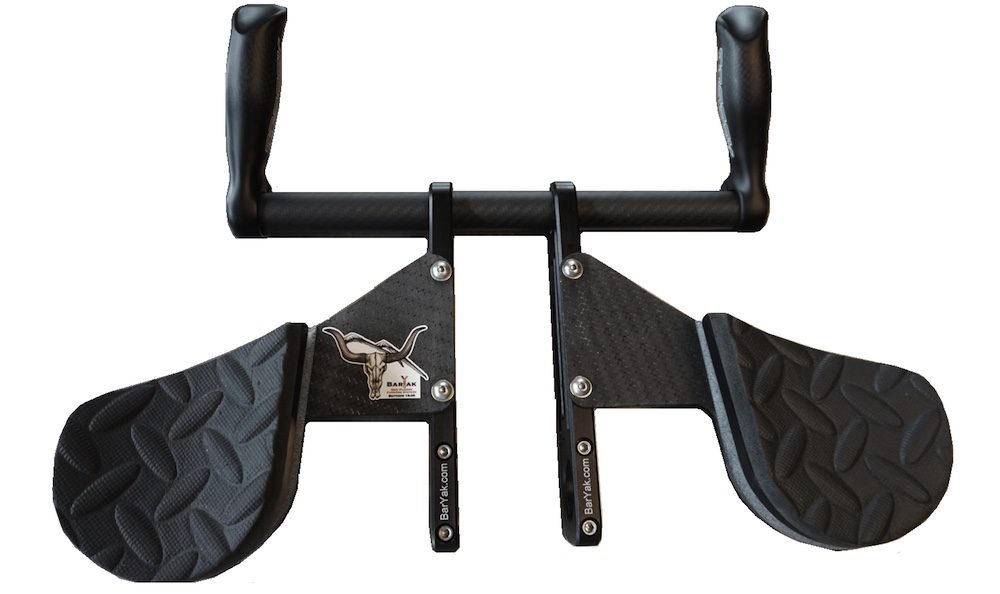
BarYak
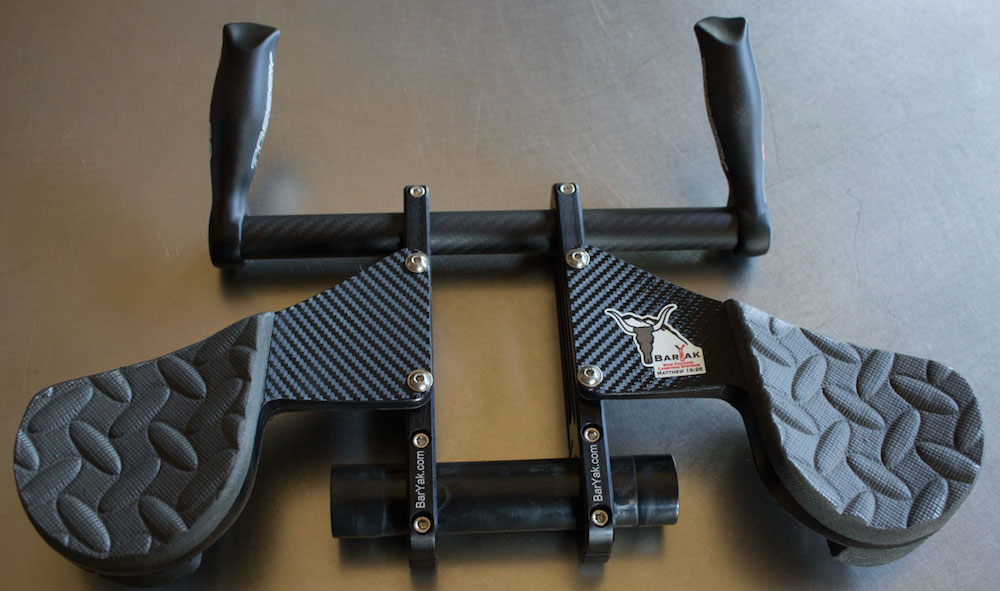
BarYak aero bars are specifically designed for bikepacking with flat handlebars. Unlike many other aero bars, their wide elbow pad spacing makes it possible to fit feed bags on either side of the stem. While the extensions aren’t as short as mini aero bars, they are still shorter than most, so that’s something to consider.
Additional benefits of the BarYak system include adjustable bar ends that let you set your preferred wrist angle, lots of room for accessories, and the ability to mount a Revelate Sweetroll handlebar pack at four locations instead of just two.
Jones Gnarwhal
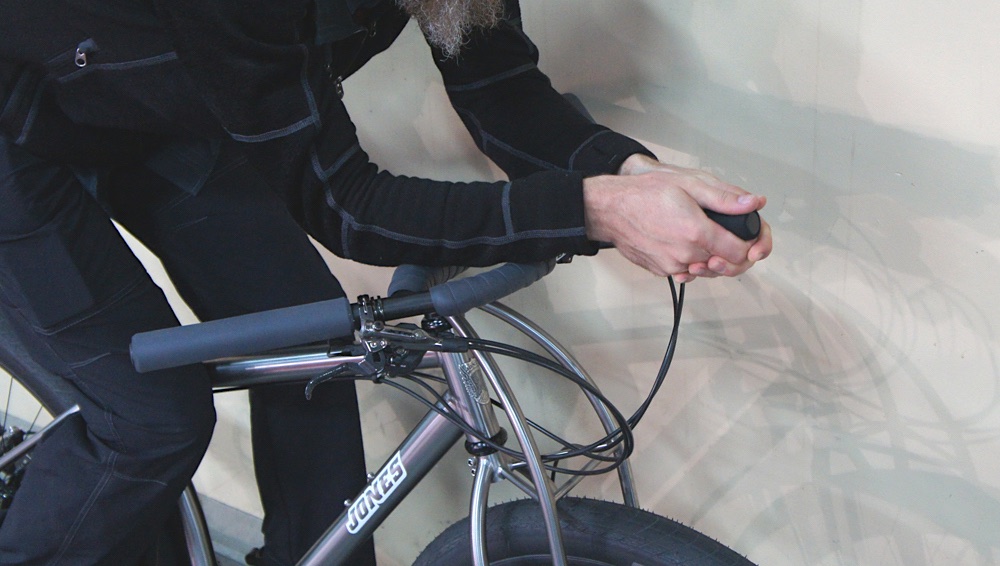
A lesser-known option for achieving an aero bar-style position is the Jones Gnarwhal. This single bar-end attachment mounts out front on a Jones Loop bar, resembling a rhino horn or narwhal tusk.
The Gnarwhal has received mixed feedback. Some riders find that simply resting their arms along the ends of the Loop bar offers a very similar position (without needing the Gnarwhal). If you choose to try it, be sure to add thick foam padding beneath your bar tape to maximize elbow comfort.
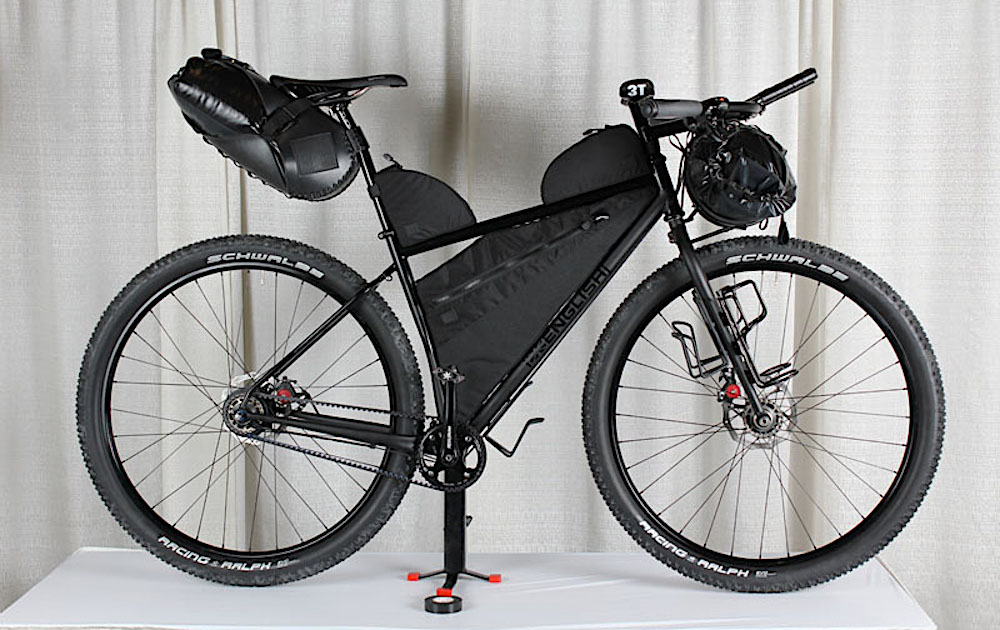
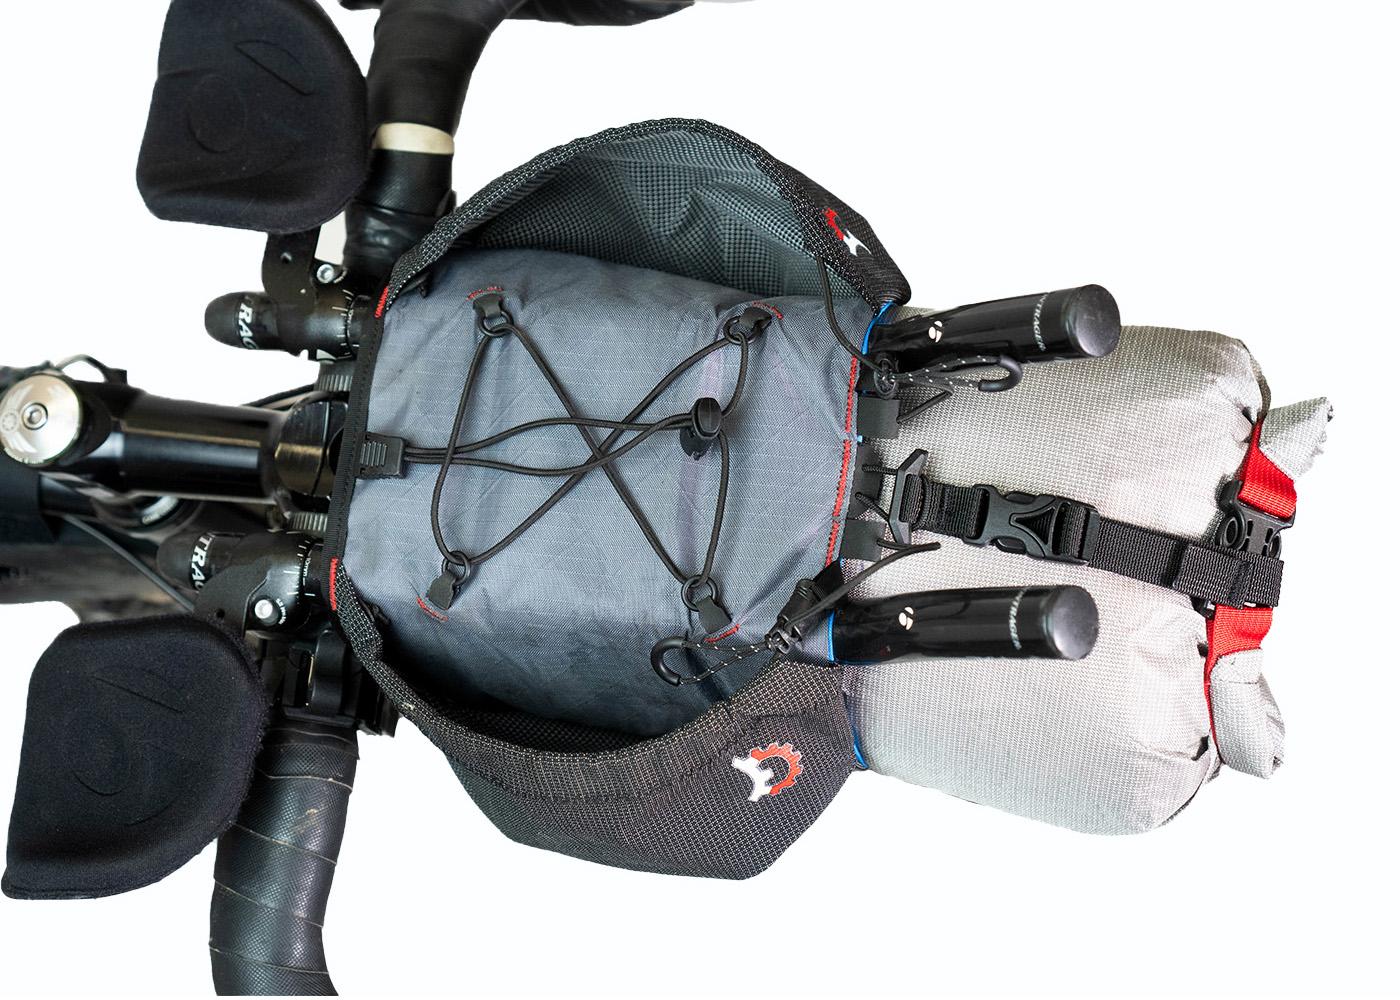
Bikepacking Bags and Aero Bars
Stem Bags
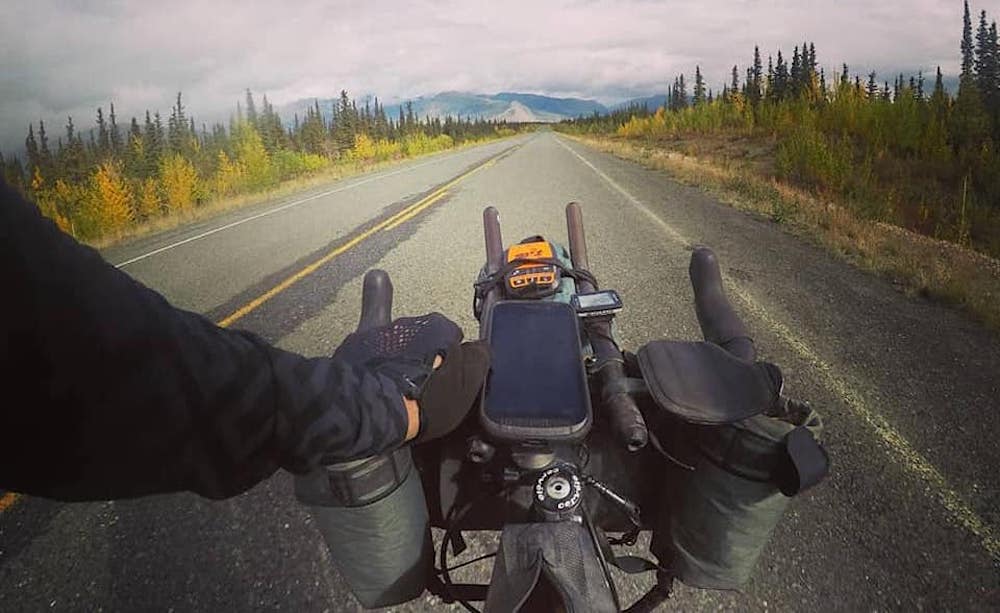
Aero bars usually compete for the same handlebar space as stem bags (aka feed bags).
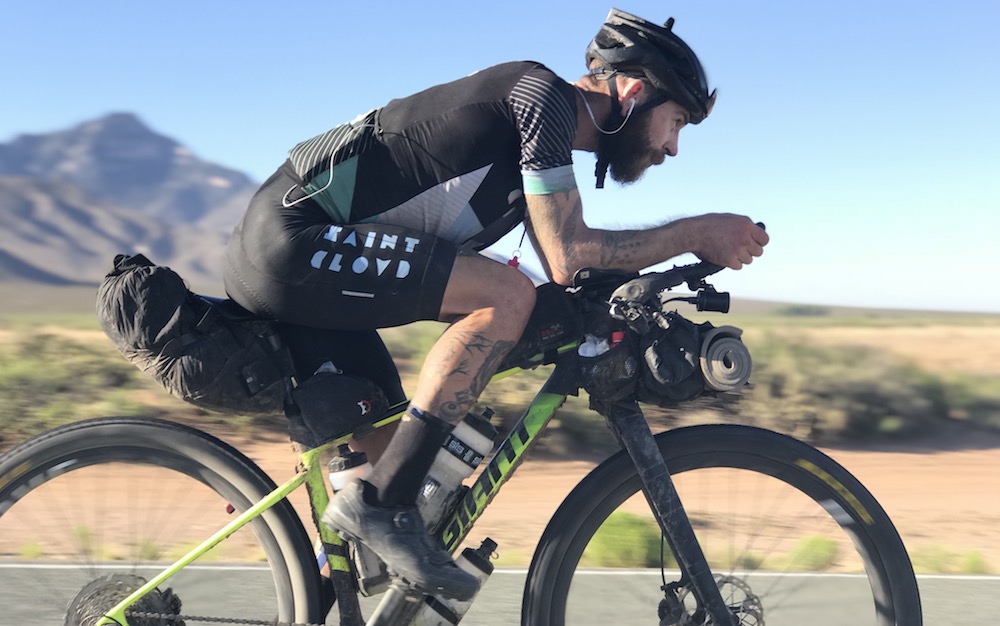
However, many riders get around this by mounting their stem bags further out to the sides or even attaching them directly to the aero bar extensions. For example, Jonas Deichmann positioned his stem bags outward during his 97-day ride from Alaska to Argentina (see photo above).
Bikepacking Bags Designed For Aero Bars
Bikepacking handlebar packs are generally easy to mount on bikes equipped with aero bars.
However, some packs are specifically designed for aero bars, such as the Revelate Pitchfork and the Restrap Race Aero Bar Bag. These bags attach at four points, ensuring a secure fit while minimising pressure on your brake and gear cables. Additionally, they sometimes include built-in storage on either side, providing a convenient location for snacks or a rain jacket.
Ortlieb Handlebar Bags
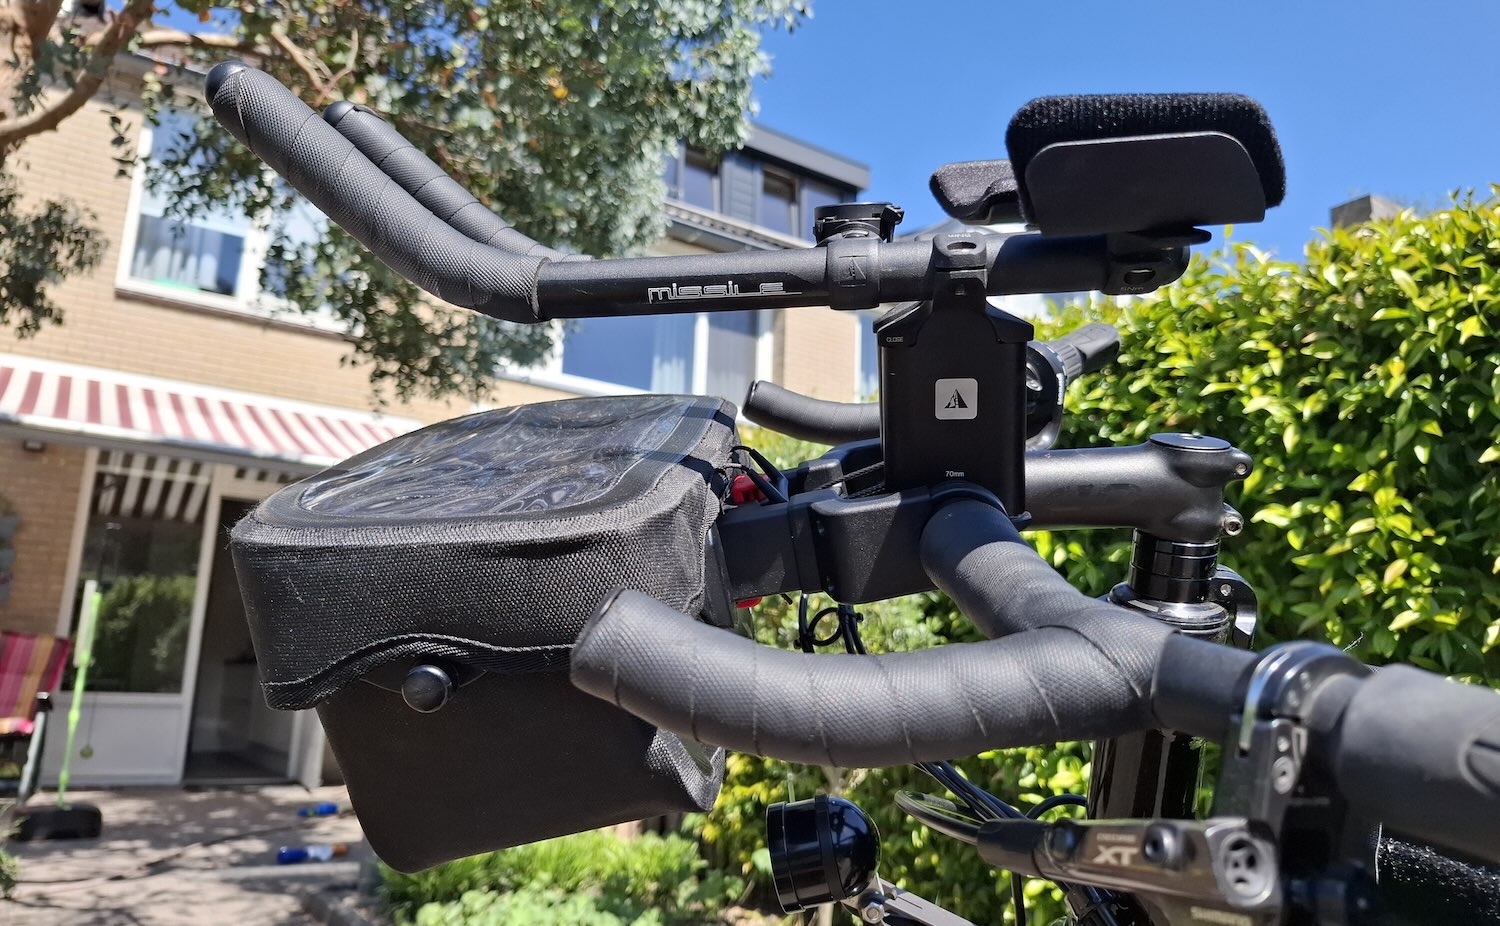
Using aero bars with a touring Ortlieb handlebar bag can be challenging, but it’s definitely doable.
One solution is the KLICKfix Handlebar Adapter E bracket, which offers a wide 110mm spacing – enough to mount your aero bars inside the bracket. To maintain easy access to the Ortlieb bag while it’s mounted, you may also need an aero bar riser kit (as shown above).
Another option is to mount the handlebar bag lower using a t-bar, though this requires sufficient spacer height beneath your stem to accommodate the setup.
Recommended Touring & Bikepacking Aero Bars
Note: If you want to buy any of these aero bars, doing it via the Amazon links gives CyclingAbout a small commission (no cost to you), which goes into creating more valuable resources for the bike travel community.
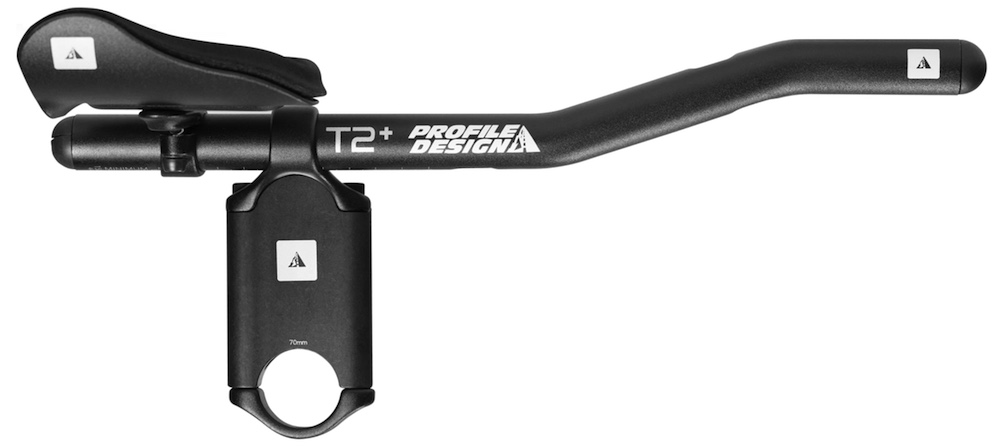
Profile Design Sonic Ergo
550 grams – 39A (US $180), 26A (US $190), 52A (US $190), 50C (US $274)
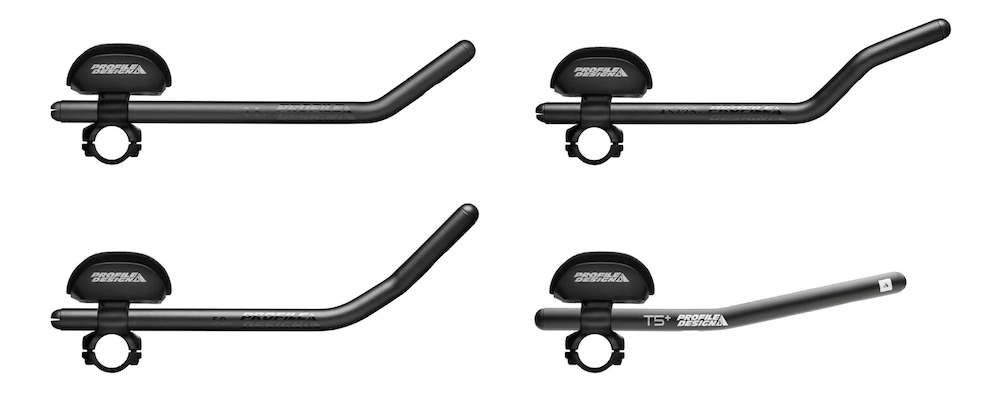
The Sonic Ergo is one of the most popular aero bars on the market, largely due to its wide range of configuration options. It offers four different extension bends, two armrest pad thicknesses, and riser kits that allow up to 70mm of height adjustment ($36 on Amazon). The extensions are adjustable for length, width, and rotation, and the arm pads can be angled inward by up to 15 degrees.
If you want some extra hand space on the top of your drops, you can also add the flip-up bracket kit (US $83 on Amazon).
Bontrager Race Lite Aero Clip-On
550 grams and US $139 on TrekBikes
The Bontrager Race Lite aero bars are the most affordable option here and offer adjustable forward and backward armrest pad positions via the sliding armrest mounts. This makes them a comfortable fit on both drop and flat handlebar bikes (without needing the Fred Bar).
However, it’s worth noting that the extensions come in only one shape, and there is no riser kit available.
Pro Missile Clip-On
484 grams and US $209 on Amazon
The Pro Missile Clip-On aero bars provide excellent armrest adjustability thanks to their sliding mounts, similar to the Bontrager Race Lite, though they come at a higher price point.
They’re available with three extension shape options, and while a riser spacer kit is available, it’s rare and carries a steep price tag, typically between $100 and $200.
RedShift Quick-Release
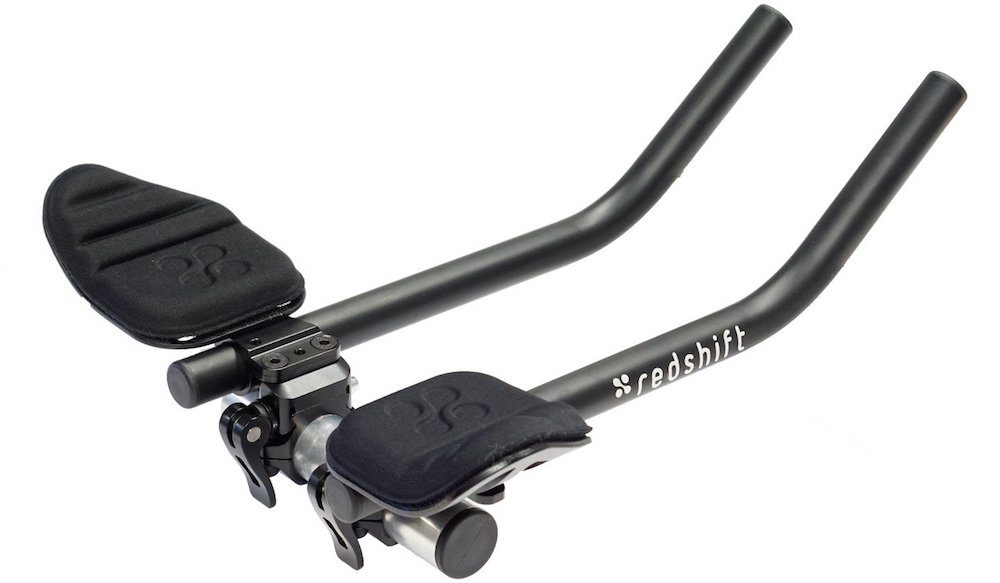
640g and US $200 on Amazon
If you plan to frequently install and remove your aero bars, the RedShift Quick-Release system is a great choice. These removable aero bars can be attached or detached in seconds, and the clamps can even be used across multiple bikes.
You can choose between two extension shapes: the more comfortable L-bend (recommended) or the flatter, more aerodynamic S-bend.
The main trade-offs with these bars are their slightly higher weight and limited armrest adjustability.
BarYak Expedition
484 grams and US $382
As mentioned earlier, BarYak aero bars provide space for feed bags and accessories, along with additional mounting points for a BarYak Talon drybag harness.
The main drawback is their limited length and armrest adjustability. That said, they can be an excellent upgrade once you’ve dialled in your ideal position using more adjustable aero bars.
VAP Butterfly 3
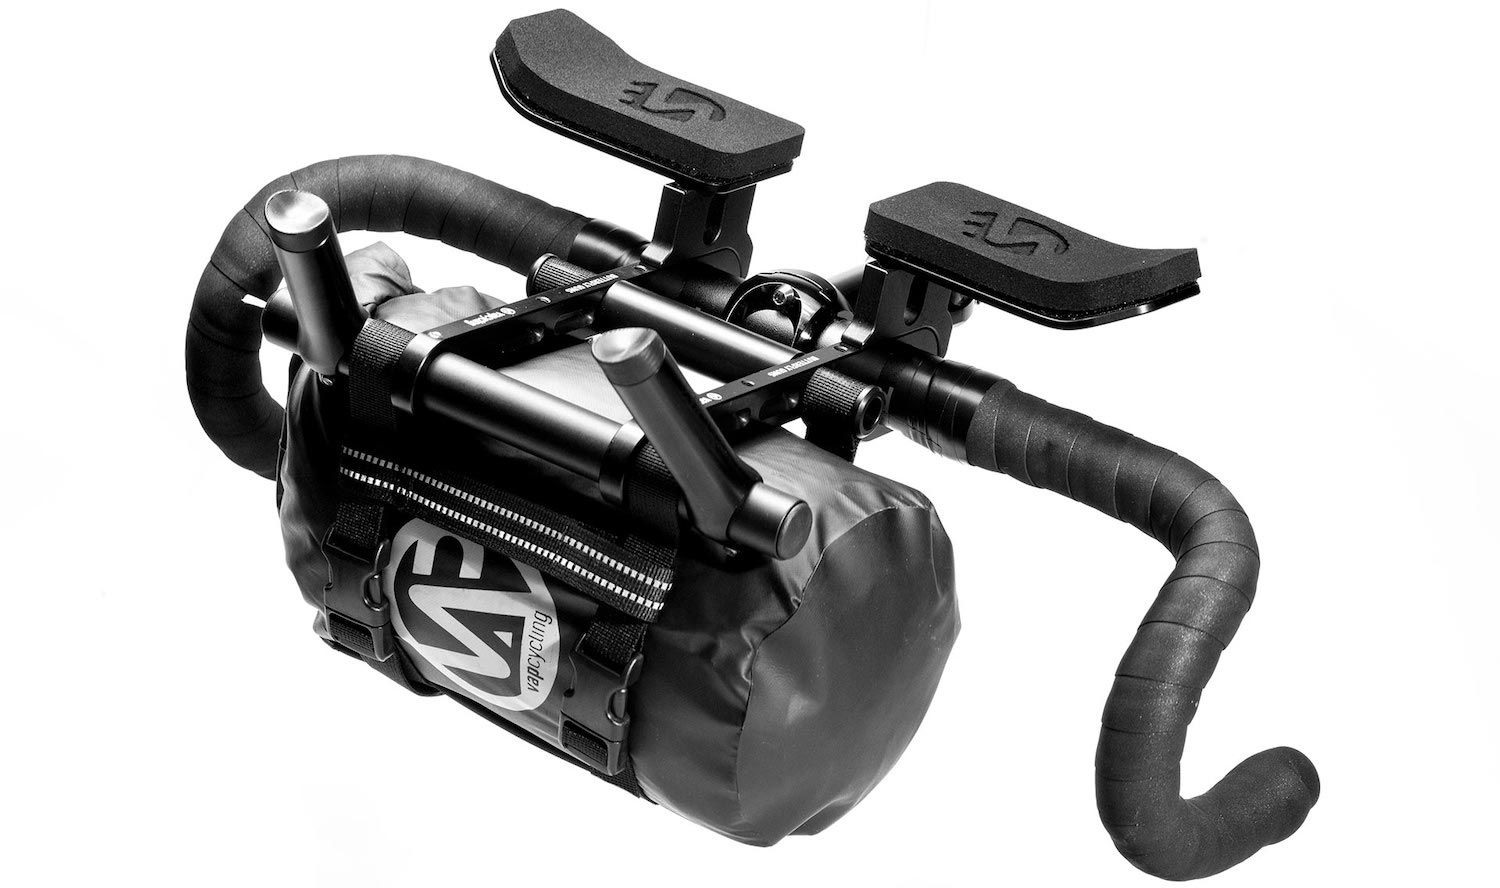
This innovative product merges a stabilised bikepacking front bag (available in 11 or 15 litres) with an integrated aero bar setup.
While the extensions come in two length options, the limited armrest adjustability makes this kit better suited for drop bar bikes.


